Wednesday 21 August 2013

Wireless Serial Communication with the Raspberry Pi - Part 2

Now I'm going to go through how to set up the other end of the wireless serial link. In my case it is a laptop computer on which runs Linux and Windows (and I'll go through how to set up both) but it could be another Raspberry Pi or practically any other computer system.

I'll be using a SFR Stick (available from Ciseco) to provide the wireless link on the laptop:


The SRF Stick is a small plug in USB module, similar in size to a USB flash drive. It can be fitted with a wire antenna to improve the range, but this means taking the case apart and drilling a hole for the wire to pass through.I decided to fit a quarter wavelength wire antenna, which in for 868 MHz is only 82mm long. This article provided guidance on fitting the antenna.


For Linux Users...

I'll start off by considering how to set the hardware up under Linux, because it is simpler than under Windows and no drivers are required.

Simply plug the SRF Stick into a spare USB port on your computer. You should see a flashing red LED. Now if you followed my blog post on how to connect to the Raspberry Pi remotely via a wired serial link then you should already have PuTTY installed and working - if not have a look at this blog post under the "For Linux users..." heading about two thirds of the way down.

Launch PuTTY (the application is called "PuTTY SSH Client"). Click on "Terminal" down the left hand side of the PuTTY Configuration window and select the "Implicit LF in every CR" option, and the "Local Echo: Force on" option (this should be very familiar to you because it's exactly what you did previously on the Raspberry Pi). Your configuration screen should look like this:


Then click on "Session"down the left hand side of the PuTTY Configuration window and select the "Serial" and specify the Serial line as "/dev/ttyACM0" and the speed as "115200". Then click on "Default Settings" and click on the "Save" button on the right. Your configuration screen should now look like this:


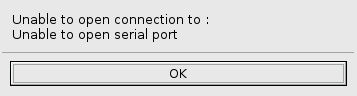
Now click on the "Open" button and you should get a blank console window. Now, in the blank console window, type "+++" , but do not press Enter. After a short delay you should get the reply "OK". This puts the SRF Stick into "command mode" so that you can change the configuration.


However, please note that (unlike with the Slice of Radio module installed in the Raspberry Pi) I was able to communicate with the SRF Stick straight away at a baud rate 115200, and did not have to go through the whole process of changing the baud rate, applying the changes, rebooting and then writing the changes to flash memory, but if you find that you can not communicate with the SRF Stick straight away at 115200 bps, you may have to go through the same process for it as you did for the Slice of Radio module...

Leaving the console window open on your Linux system (in my case my laptop), launch PuTTY on the Raspberry Pi and open a console window. Type some text on the console window on the Raspberry Pi. As if by magic, the text will also appear on the console window on your Linux system, and the reverse is also true - if you type into the console window on your Linux system, the same text will appear in the console window on your Raspberry Pi.

The following screenshot was taken from my Linux system. I typed "Hello Laptop" on my Raspberry Pi, and then replied by typing "Hello Raspberry PI" on my Linux system (my laptop).


Congratulations, you've just created a very simple "instant messaging" system... Now close PuTTY on both the Raspberry Pi and the Linux system. Then relaunch PuTTY on the Linux system and change the Terminal settings so that the "Implicit LF in every CR" option is not selected, and set the "Local Echo" option to Auto. The PuTTY configuration screen on your Linux system should look like this:


Save these settings by clicking on "Session", then "Default Settings" and finally "Save". Then click "Open" to start a new session on the Linux system. You should see a blank console window as before.

Now, reboot your Raspberry Pi, and as it reboots, keep an eye on the console window on your Linux system. As the Raspberry Pi boots up the bootup information should appear in the console window on the Linux system. It should look something like this, but may be slightly different depending on how your Raspberry Pi is setup and what peripherals you have connected to it.


Leave the console window open on your Linux system, and log on to your Raspberry Pi. Go into the GUI and open an LXTerminal window. Type "sudo leafpad /etc/inittab" at the command line prompt and press Enter:

pi@raspberrypi ~ $ sudo leafpad /etc/inittab_

Scroll down to the end of the file and reinstate the very last line by deleting the "#" at the beginning of the line. Your file should now look like this:


Save the file, quit Leafpad and reboot your Raspberry Pi. This time, the console window on your Linux system should present you with a login prompt:


Go ahead and login!

You should now be able to access your Raspberry Pi remotely, and wirelessly. With this configuration, the only thing the Raspberry Pi needs to operate is a source of power, which opens up all sorts of possibilities for portable operation, and by using the Ciseco RF modules the range should be much greater than would be possible using WiFi or Bluetooth.

Monday 19 August 2013

Wireless Serial Communication with the Raspberry Pi - Part 1

Now I'm going to log on to my Raspberry Pi remotely using the Pi console (like I did in my previous post), but this time do it wirelessly using RF modules from Ciseco. For my Raspberry Pi I'm going to use one of the "Slice of Radio" modules:


This handy little module plugs directly in to the GPIO header on the Raspberry Pi....


...and it's small enough to fit inside my standard Raspberry Pi case.


However, before closing up the case I decided to fit wire antenna to extend the range of the module. This entailed soldering a quarter wavelength long piece of wire on the the Slice of Radio board (Ciseco provide details of where to attach antennae to their products here).


Finally, I had to drill a small hole in the top of my Raspberry Pi case to allow the antenna to pass through.


Now connect mouse, keyboard and display to the Raspberry Pi and power up as normal. In oerder to set up the Slice of Radio module, you first of all have to prevent the Raspberry Pi using the serial port on the GPIO header exclusively for console access, but this is easy to do.

Once you've logged in to your Pi and started the GUI, launch Leafpad and open the file /etc/inittab. The easiest way to do this if to open an LXTerminal window and type "sudo leafpad /etc/inittab" at the command line prompt and press Enter:

pi@raspberrypi ~ $ sudo leafpad /etc/inittab_

This will open the file /etc/initab with the necessary permissions so that you can make changes (if you get a blank window after entering this command you've probably made a typo - close the blank window and try again, making sure you spell inittab with two t's). Scroll down to the end of the file and commment out the very last line by inserting  "#" at the beginneing of the line. Your file should now look like this:


Save the file, quit Leafpad and reboot your Raspberry Pi. You are now ready to configure the "Slice of Radio" module.

If you don't already have it, download and install PuTTY from the repository by entering the following at the command line prompt and pressing Enter:

pi@raspberrypi ~ $ sudo apt-get install putty_

Start the GUI and launch PuTTY (the application is called "PuTTY SSH Client" you'll probably find it under the "Internet" sub menu. Right click on it and then click "Add to desktop" to add a shortcut to your desktop for easy access.

Click on "Terminal" down the left hand side of the PuTTY Configuration window and select the "Implicit LF in every CR" option, and the "Local Echo: Force on" option so that your configuration screen looks like this:


Then click on "Session"down the left hand side of the PuTTY Configuration window and select the "Serial" and specify the Serial line as "/dev/ttyAMA0" and the speed as "9600". Then click on "Default Settings" and click on the "Save" button on the right. Your configuration screen should now look like this:


Now click on the "Open" button and you should get a blank console window like this:


However, you may well get an error message like this:


Hmmm... don't worry, this is easily fixed! Open an LXTerminal window and type the following at the command line prompt and press Enter:

pi@raspberrypi ~ $ sudo usermod -a -G dialout pi_

Then reboot your Raspberry Pi for the changes to take effect.

Log back in and start the GUI and launch PuTTY. If you followed the instructions above, the settings you changed before should have been saved, if not, you'll need to change them again. Click on the "Open" button and hopefully this time you should not get the error message....

Now, in the blank console window, type "+++" , but do not press Enter. After a short delay you should get the reply "OK". This puts the Slice of Radio module into "command mode" so that you can change the configuration. The console window should now look like this:


Now we need to change the baud rate to 115200 bps , which is the rate the Raspberry Pi uses for console operation and for sending bootup information to the GPIO serial port.

Type in "+++" again (without pressing Enter) to enter command mode and when you get the response "OK", within 5 seconds type "ATBD" and press Enter. You should get the response "02580" which is the baud rate 9600 expressed in Hex, which is the baud rate currently being used. The console window should now look like this:


If you didn't manage to type the "ATBD" command in and press Enter within the 5 seconds, you won't get any response and you'll have to type "+++" again to enter command mode and try it again...

Type in "+++" again (without pressing Enter) to enter command mode and when you get the response "OK", within 5 seconds type "ATBD 1C200" and press Enter. This will change the baud rate to 115200 bps (which is 1C200 in Hex). You should get the response "OK". Wait for a few seconds before proceeding.

Now you need to apply this change - type "+++" to enter command mode and when you get the "OK" response, type "ATAC" and press Enter. You should get the response "OK". Wait for a few seconds before proceeding.

Type "+++" again (without pressing Enter).... this time you should not get any response! This is because you have just changes the baud rate to 115200 bps, but you are still using PuTTY settings for 9600 bps. The console window should now look like this:


Close the console window by clicking on the "X" at the top right corner and click on "Yes" when asked if you are sure you want to close this session":


Now, launch PuTTY again and change the baud rate to 115200. Then click on "Default Settings" and click on the "Save" button on the right. Your configuration screen should now look like this:


Now click on the "Open" button and when you get a blank console window, type "+++" to enter command mode. When you get the "OK" response type "ATWR" and press Enter. This will write the changes you've made to flash memory so that next time the Slice of Radio is powered up it will use the 115200 bps baud rate instead of the 9600 bps factory default. If all has gone according to plan, you should get the response "OK" and the console window should now look like this:


Congratulations if you've got this far. Your Slice of Radio module should now be setup to use 115200 bps, unless you specifically change it. You can check this by powering down your Raspberry Pi, powering it back up again and launching PuTTY (set for 115200 bps), entering command mode, and using the "ATBD" command to display the baud rate being used.

In my next post I'll go through how to set up the other end of the wireless serial link.