Thursday, 28 February 2013

Updating Your Raspberry Pi's Kernel and Firmware

In the post "Updating Your System" we covered how to keep all your applications and your Linux distribution up to date, but this will not give you the latest Linux kernel or firmware. To find out the version of the Linux kernel on your system type "uname -a" at the command line prompt and press Enter:

pi@raspberrypi ~ $ uname -a_

To find out the version of the firmware installed on your system "sudo vcgencmd version" at the command line prompt and press Enter:

pi@raspberrypi ~ $ sudo vcgencmd version_

You should get results similar to what is shown in the following screenshot:


You can use a package called "rpi-update" to update the Linux kernel and the firmware on your Raspberry Pi, but this package is not available through the repository so you will have to download and install it manually. First of all though, you need to carry out a couple of preparatory tasks.

The first task is to ensure that your Raspberry Pi has the correct date and time by querying a Network Time Protocol (NTP) server. To install the necessary software type "sudo apt-get install ntpdate" at the command line prompt and press Enter:

pi@raspberrypi ~ $ sudo apt-get install ntpdate_

To use "ntpdate" to retrieve the correct time and date from a NTP server (in this case the NTP server at the National Physical Laboratory) type "sudo ntpdate -u ntp1.npl.co.uk" at the command line prompt and press Enter:

pi@raspberrypi ~ $ sudo ntpdate -u ntp1.npl.co.uk_

To ensure that your system has the latest security certificates type "sudo apt-get install ca-certificates" at the command line prompt and press Enter:


pi@raspberrypi ~ $ sudo apt-get install ca-certificates_

Next, you need to download and install the "git" package from the repository. To do this type "sudo apt-get install git" at the command line prompt and press Enter:

pi@raspberrypi ~ $ sudo apt-get install git_

Now you are ready to download and install the "rpi-update package. Type "sudo wget http://goo.gl/1BOfJ -O /usr/bin/rpi-update" at the command line prompt and press Enter:


pi@raspberrypi ~ $ sudo wget http://goo.gl/1BOfJ -O /usr/bin/rpi-update_

Finally to set up the necessary file permissions type "sudo chmod +x /usr/bin/rpi-update" at the command line prompt and press Enter:

pi@raspberrypi ~ $ sudo chmod +x /usr/bin/rpi-update_

You are now ready to run "rpi-update". Type "sudo rpi-update" at the command line prompt and press Enter:

pi@raspberrypi ~ $ sudo rpi-update_

This will produce a lot of text scrolling up your screen followed by a lengthy download (nearly 40 MB) and install process (I suggest you go and make yourself a cup of coffee while it is going on).

When finished and you are back to the command line prompt shut down your Raspberry Pi and restart it for the updates to become effective. Once you are back at the command line prompt (or an LXTerminal window) you can check what versions of kernel and firmware you have by using the "uname -a" and "sudo vcgencmd version" commands again. When I did this today I obtained the results shown in the following screenshot.


You can see that the Linux kernel on my Raspberry Pi is now version 3.6.11+ (previously 3.2.27+) and the firmware is now version 367974 (previously 346337).

Although it is not strictly necessary to update your Raspberry Pi's Linux kernel and firmware in this way it may be useful to know how to do it if you encounter any problems with (for example) unsupported hardware, as the problem may have been resolved by a later version of the Linux kernel or firmware. All software, and especially open source software like Linux evolves over time as new functionality is added and bugs are found and fixed, so it is always useful to have the latest versions of system software.

Saturday, 16 February 2013

PSK31 on the Raspberry Pi - Part 1

As I mentioned in my last post, I am a radio amateur and I'm interested in using the Raspberry Pi to operate using various digital modes, including PSK31. To do this requires an audio input to and output from the Raspberry Pi (see my previous post) and a suitable application to encode and decode the PSK31 signal, as well as a radio transceiver and antenna. The possibility of using the Raspberry Pi for operating PSK31 has intrigued me because it would offer a low cost, low power, silent and potentially mobile station setup - the only other alternative is to use a desktop or laptop computer.

If you do an internet search for "Raspberry Pi PSK31" you will get a few results, most of which bemoan the Raspberry Pi's lack of processor power for running "Fldigi" which is probably the most popular Linux application for PSK31. I have tried running "Fldigi" on the Raspberry Pi and whilst it does run, I feel that it is just too demanding on the modest resources of the Raspberry Pi.

Searching the repository for "PSK31" or "amateur radio" yields a few alternatives and I have been experimenting with some of these applications. The one I have had the most success with is called "LinPSK". To download and install LinPSK open a LXTerminal window and type the following and press Enter:

pi@raspberrypi ~ $ sudo apt-get install linpsk_

To make the USB audio device available to "LinPSK" you need to create a file called ".asoundrc" in the "/home/pi" folder containing the following text:

pcm.LinPSK_card {
       type hw
       card 1
       }
ctl.LinPSK_card {
       type hw
       card 1
       }
pcm.LinPSK_Play {
       type plug
       slave {
       pcm "LinPSK_card"
       }
}
pcm.LinPSK_Record {
       type plug
       slave {
       pcm "LinPSK_card"
       }
}


To save you having to type in all the above text, there is a file called "asoundrc" in the folder "/usr/share/doc/linpsk" which you can copy over to the "/home/pi" folder, edit and rename as ".asoundrc". If there already is a file called ".asoundrc" in the "/home/pi" folder then you should append the above text to the end of the existing file. Have a look at this post if you need help creating or editing files.

Once you have saved and closed the ".asoundrc" file the "LinPSK" application should have access to the USB audio device. The above procedure assumes that the on-board audio device is designated "card 0" and that the USB audio device is designated "card 1", but this should be the case as long as you do not have any other audio devices connected to your Raspberry Pi.

Connect the audio output from your transceiver to the input of the the USB audio device via a suitable isolating interface and tune the transceiver to a PSK31 signal. Launch the "LinPSK" application and maximize the window so that it occupies the whole screen. Click on the square button labelled "RX" located left of center. The waterfall on the bottom left of the screen should come to life. Click on one of the peaks in the waterfall and you should start to decode the PSK31 signal.


You may notice that I also have an LXTerminal window open. This is running "AlsaMixer" in the background so that I can adjust the level of the audio input to the Raspberry Pi. I found that the best setting for me was to turn the "Auto Gain Control" off and set the "Mic" capture control to about half way, but I suggest that you experiment with the settings and find what works best for you. Also note that the load on the Raspberry Pi's processor is quite acceptable (as shown by the small scrolling graph on the right hand end of the task bar) with LinPSK and AlsaMixer both running.

The LinPSK application may also be used for QPSK, RTTY and MFSK16. There is an extensive user guide for LinPSK available here, although it does relate to an older version of the application.

Monday, 11 February 2013

Adding an Audio Input Device

The Raspberry Pi comes with a 3.5mm analogue stereo audio output, but no input. As a radio amateur I am interested in using the Raspberry Pi to decode various digital modes, but for it to do this I need an audio input. This can be achieved by connecting a USB audio device to your Raspberry Pi (like this one supplied by Cut Price Cables).


Make sure your Raspberry Pi is turned off and insert the USB audio device into one of the USB sockets on the Raspberry Pi, and then power up your Raspberry Pi. The USB audio device should be automatically installed. Go in to the LXDE GUI and open a LXTerminal window and type the following and press Enter:

pi@raspberrypi ~ $ sudo apt-get install alsa-utils_

You may already have this package on your system, but entering this command won't do any harm even if you do. This will install a package of ALSA utilities if you don't already have them (ALSA stands for Advances Linux Sound Architecture). Then type "alsamixer" and press Enter:

pi@raspberrypi ~ $ alsamixer_

This will run the AlsaMixer application in a LXTerminal window:


This shows the on-board audio device's playback control (note that the chip is called "Broadcom Mixer"). Press "F6" and you should see a small pop-up "window" with all the available sound cards listed.


 The item "0 bcm2835 ALSA" is the on-board audio device, and the item "1 C-MediaUSB Audio Device" is the USB audio device. Use the arrow keys to select the "1 C-MediaUSB Audio Device" item and press Enter:


This shows the playback controls for the USB audio device. Use the right and left arrow keys to select the control you wish to adjust and then use the up and down arrow keys to adjust the level. With "Speaker" selected, pressing "m" key on your keyboard will toggle the mute function on the audio output (when muted, "MM" appears instead of "OO" at the bottom of the control). Likewise, the "Mic" control  (which actually refers to the level of microphone input fed back through to the audio output) can be muted, and is shown so in the above screenshot (note the "MM" at the bottom of the control). The "Auto Gain Control" item can not be adjusted with the arrow keys, but can be turned on and off by pressing the "m" key.

Now, if you press "F4" the display will change to show the audio capture control for the USB audio device:


This control is used to adjust the level of audio input from the audio device to the Raspberry Pi, and may be muted by pressing the space bar on your keyboard (but this will not mute the audio fed back through to the audio output).

If you press "F5" you will be able to see and adjust the playback and capture controls together in the same window:


The above screenshot shows the "Speaker" playback control set to 50%, the "Mic" capture control set to 50%, but the "Mic" playback control is muted (and also reduced to zero) and the "Auto Gain Control" is turned on.

The following final section of this post is optional....

There is a "proper" graphical user interface available for the AlsaMixer application. To download and install it type the following at the command line prompt and press Enter:

pi@raspberrypi ~ $ sudo apt-get install alsamixergui_

Once installed, you will find the "Alsamixergui" application under the "Sound & Vision" submenu of the "Start Menu" in the LXDE GUI.


This application works in a similar way to the AlsaMixer application (although note that in the above screenshot the "Mic" controls have been swapped over). In practice I actually found the basic AlsaMixer application (when run in a LXTerminal window) easier to use than the AlsaMixerGUI version, not least of all because the GUI version does not allow you to choose which audio device you want to control - you can only control the "default" ALSA audio device.

To make the USB audio device the default ALSA audio device, you need to create a file called ".asoundrc" in the "/home/pi" folder containing the following text:

pcm.!default {
       type hw
       card 1
       }
ctl.!default {
       type hw
       card 1
       }

If there already is a file called ".asoundrc" in the "/home/pi" folder then append the above text to the end of the existing file. Have a look at this post if you need help creating or editing files.

Once you have saved and closed the ".asoundrc" file you should be able to control the USB audio device using the AlsaMixerGUI application. The above procedure assumes that the on-board audio device is designated "card 0" and that the USB audio device is designated "card 1", but this should be the case as long as you do not have any other audio devices connected to your Raspberry Pi.

Friday, 8 February 2013

Setting Up Wireless Networking - Part 2


Now you should have all the software you need to connect to and manage wireless networking on your Raspberry Pi, but you need a WiFi adapter. Cut Price Cables supply a very small WiFi adapter for the Raspberry Pi:


This WiFi adapter is certified to 802.11n and capable of data transfer speeds of up to 150Mbps. It also has very low power consumption making it ideal for use with the Raspberry Pi.

With your Raspberry Pi turned off, insert the WiFi adapter in to one of the USB sockets and then power up your Raspberry Pi. Go to the LXDE GUI and double click on the "Wifi Config" (or "wpa_gui") icon to launch the application.

Notice that "wlan0" should appear in the "Adapter" box. If this box is blank then you may need to check your setup as detailed in my previous post. Click on the "Scan" button to display the "Scan results" window:


Click on the "Scan" button on the "Scan results window". Details of your WiFi network should appear at the top of the window. If there is more than one WiFi network available then there should be multiple entries in the "Scan results" window. Double click on the WiFi network you wish to join. This will display a window where you can enter security details for the WiFi network of your choice.


Enter the necessary details and click "Add". Then click "Close" on the "Scan results" window. The name of your chosen WiFi network should now appear in the "Network" box on the main "wpa_gui" window:


Click on the "Connect" button to connect to your chosen network. After a few seconds the "wpa_gui" window should show full details of your chosen WiFi network:


Save the current settings by clicking on "File>Save Configuration" and then close the "wpa_gui" application by clicking on "File>Exit". Logout of the LXDE GUI and shut down your Raspberry Pi. Disconnect any wired network connection you have before rebooting. Once back into the LXDE GUI open an "LXTerminal" window and type "ip address show" at the command line prompt and pressing Enter:


In my case this shows that the wireless network "wlan0" is connected with an IP address of "192.168.1.106" and that the wired network "eth0" is not connected. You may also want to open your favourite web browser and check that you have access to the internet.

Thursday, 7 February 2013

Setting Up Wireless Networking - Part 1

Some of the more recent distributions of Raspbian "Wheezy" already include the necessary apps for managing WiFi networking - look for an icon called "Wifi Config" (or "wpa_gui") on your LXDE desktop, or an application called "wpa_gui" under the "Internet" sub-menu of the "Start Menu". If you have this icon on your desktop (or in your start menu) you can probably skip the rest of this post and go on to "Setting Up Wireless Networking - Part 2".

To install the wireless network software type the following at the command line prompt and press Enter:

pi@raspberrypi ~ $ sudo apt-get install wpasupplicant_

You may already have this package on your system, but entering this command won't do any harm even if you do. Then type the following and press Enter:

pi@raspberrypi ~ $ sudo apt-get install wpagui_

Once these packages have been downloaded and installed go to the LXDE GUI and you should have an application called "wpa_gui" under the "Internet" sub-menu of the "Start Menu". If you right click on this menu item and then click on "Add to Desktop" a shortcut to this app will be placed on your LXDE desktop for future reference.

Now we need to configure wireless networking. Double click on the "File Manager" icon on the LXDE dessktop, or go open the "Start Menu" by clicking on the strange looking icon on the bottom left corner of the screen and select "Assessories>File Manager". Go to the /etc/network folder and click on the "Tools" menu and select "Open Current Folder as Root":


This will open a new "File Manager" window. Now right click on the "interfaces" file and click on "Leafpad", or if this option isn't available, click on "Open with..." and choose "Accessories>Leafpad" and click "OK":


This should open a new "Leafpad" window containing the "interfaces" file. Go to the end (bottom) of the file and then edit the file by typing in the following lines of text:

allow-hotplug wlan0
iface wlan0 inet manual
wpa-roam /etc/wpa_supplicant/wpa_supplicant.conf
iface default inet dhcp

The "interfaces" file should now look like the following screenshot:


Now click "File>Save" and then "File>Quit". Go back to the "File Manager" window that you opened as "Root"  (this is the one with "root" at the top of the list of "Places" on the left side of the window). Go to the /etc/wpa_supplicant folder. Right click anywhere in the window and select "Create New...>Blank File"


Enter the name "wpa_supplicant.conf" and click "OK".


You should now have a new file called "wpa_supplicant.conf" in the /etc/wpa_supplicant folder:


Right click on the new file and open it in "Leafpad", and then enter the following text into the blank file:

ctrl_interface=DIR=/var/run/wpa_supplicant GROUP=netdev
update_config=1

Save the file by clicking on "File>Save" and then close "Leafpad". You can also now close both "File Manager" windows that are open.

Finally, open a "LXTerminal" window and type the following at the command prompt and press Enter:

pi@raspberrypi ~ $ sudo chmod 600 /etc/wpa_supplicant/wpa_supplicant.conf_

Please note that the above command should all be entered on one line, but there was insufficient space to do so here. Then enter the following command and press Enter:

pi@raspberrypi ~ $ sudo adduser pi netdev_

You should get confirmation that user "pi" has been added to group "netdev":


Now close the LXDE GUI and shut down your Raspberry Pi. The changes you have made will take effect next time your Raspberry Pi is botted up.

Tuesday, 5 February 2013

Installing Application Software

There are a few software applications bundled with the operating system, but sooner or later you'll want to download and install some other software. Say, for example, that you want a spreadsheet application. . You can search the software repository for spreadsheet applications by typing "apt-cache search spreadsheet" at the command line prompt and pressing Enter:

pi@raspberrypi ~ $ apt-cache search spreadsheet_

This will display a huge list of available software packages, which may be a bit intimidating! Perhaps a better approach is to use an internet search engine to try and find a specific software app. The Raspbian "Wheezy" operating system gives you access to the Debian software repository, so I searched for "Debian spreadsheet application" on Google and came up with an spreadsheet application called "Gnumeric". Now you search the repository for "Gnumeric" by typing "apt-cache search gnumeric" at the command line prompt and pressing Enter:

pi@raspberrypi ~ $ apt-cache search gnumeric_

This will give you a less intimidating list of results. Now you can download and install the Gnumeric spreadsheet application by typing "sudo apt-get install gnumeric" at the command line prompt and pressing Enter:

pi@raspberrypi ~ $ sudo apt-get install gnumeric_

Your Raspberry Pi will now download and install the Gnumeric spreadsheet application, reporting its progress on your display screen as it goes. This may take a few minutes to complete, but when finished you will be returned to the Linux command line prompt.

If you have been entering the above commands directly at the command line prompt then you should start the LXDE GUI by typing "startx" and pressing Enter:

pi@raspberrypi ~ $ startx_

However, if you have been entering the above commands in a LXTerminal window, all you have to do is close the LXTerminal window.

Click on the strange looking icon at the bottom left corner of the screen to access the "Start Menu". There should now be a menu item called "Office" - place the cursor over "Office" and you should get a sub-menu containing "Gnumeric". Click on "Gnumeric" to launch the application:


If would also like a word processor application, then try searching for and installing "AbiWord":


There is a huge range of free software available for download from the Debian software repository - the only limiting factor is your imagination, and the speed of your broadband connection, however you may find that some of the apps don't run on the Raspberry Pi due to its limited processing power and RAM.

Monday, 4 February 2013

Updating Your System

Now that your Raspberry Pi is connected to the internet the first thing to do is to download the most recent updates for your Raspbian "Wheezy" operating system. To do this type "sudo apt-get dist-upgrade" at the command line prompt and press Enter:

pi@raspberrypi ~ $ sudo apt-get dist-upgrade_

Your Raspberry Pi will now download and install the latest updates for your operating system. This may take a while. As it is progressing you will see a lot of text scrolling up your display screen.

The Raspbian "Wheezy" operating system on your Raspberry Pi also gives you access to a huge library of (mostly free) software called the repository.  The "apt" part of the command you just entered stands for "Advanced Packaging Tool" and this is the management tool for the software repository. The operating system maintains a database file of all the software in the repository and you can download the latest version of this database by typing "sudo apt-get update" at the command line prompt and pressing Enter:

pi@raspberrypi ~ $ sudo apt-get update_

Your Raspberry Pi will now download and install the latest repository database files and will report it's progress by displaying various lines of text on your screen. When completed type "sudo apt-get upgrade" at the command line prompt and press Enter:

pi@raspberrypi ~ $ sudo apt-get upgrade_

This will instruct your Raspberry Pi to download and install the latest updates for all the software installed on your system. This may be a large download and may take a while. Once again as it is progressing you will see a lot of text scrolling up your display screen.

The Raspberry "Wheezy" operating system and all the software installed on your Rasperry Pi should now be up to date. It is a good idea to run all three of the above commands regularly to ensure that your system has all the latest updates.

Sunday, 3 February 2013

Connecting to a Network

To connect your Raspberry Pi to a network, simply insert a ethernet (CAT 5e) cable (available from Cut Price Cables) into the ethernet socket next to the two USB ports. Provided the other end of the cable is connected to a local area network (via a router for example) your Raspberry Pi should automatically connect  to the network, and the FDX (Full Duplex) LED, LNK (Link) LED and 100 (100MBit) LED should all light up (green, green and yellow respectively). You can check what the IP address of your Raspberry Pi is on the network by opening a LXTerminal window and typing "ip address show" at the command line prompt and pressing Enter. This will give you the following information:


The IP address is the sequence of numbers following "inet", so in my case it is "192.168.1.104". You'll need this information if you want to access your Raspberry Pi from another computer on your network. However please note that this IP address may not always be the same each time you connect your Raspberry Pi to a network.

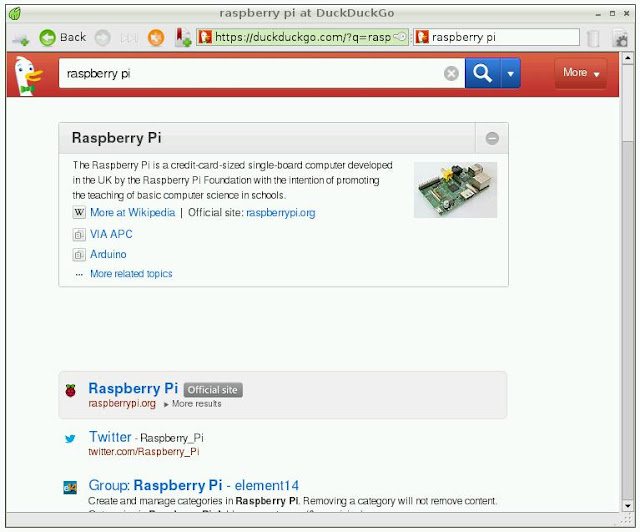
Double click on the "Midori" icon on your desktop. This will open up a web browser window and in a few moments the Midori FAQ page will load. To check that you are actually connected to the network (and assuming the network has access to the internet) click on the text box on the top right of the screen containing the words "Duck Duck Go" and type (for example) "Raspberry Pi" and press Enter. You should receive a list of search engine results (provided by the Duck Duck Go search engine) for the Raspberry Pi.


Welcome to the World Wide Web, Raspberry Pi style! You may have another web browser available to you - have a look under the "Internet" section of the "Start Menu" on the LXDE GUI desktop. I found the web browser "NetSurf" to be more stable and easier to use than "Midori".

Saturday, 2 February 2013

More Essential Accessories

If you've got this far then you probably have some ideas about what you want to do with your Raspberry Pi and you've probably keen to try to use some other USB devices with your Pi, but both USB ports are already being used (by the keyboard and mouse). The obvious answer is to use a USB hub to provide more ports.


You can use a powered hub if you wish, but as long as your Raspberry Pi power supply is up to the job and you don't connect too many peripherals, then you will be ok with a non powered hub like the one shown above, which is available from Cut Price Cables. Simply plug the hub into one of the USB ports on your Raspberry Pi and this will give you four USB ports which can be used for keyboard, mouse, and other peripherals.


Although not essential, I would strongly recommend that you invest in a case for your raspberry pi. This will keep your Pi in pristine condition and prevent accidental damage of the PCB. The case shown above is available from Cut Price Cables in a range of colours, but personally I think it looks best in black.

Friday, 1 February 2013

Booting Straight to the GUI


In my previous post "Using the GUI" I explained how to access the LXDE GUI desktop environment. However you can configure your Raspberry Pi to go straight to the LXDE GUI when it is turned on (without first going to the Linux command line). To do this you need to run the Raspberry Pi configuration utility by typing "sudo raspi-config" at the command line prompt and pressing Enter:

pi@raspberrypi ~ $ sudo raspi-config_

Use the arrow keys to move down to the "boot_behaviour" command and press Enter. You should see a dialogue asking you to confirm that you want to "boot straight to desktop":

Press Enter to confirm your choice. Then use the right arrow key to move the cursor down until "Finish" is highlighted in red and press Enter. You will see a dialogue asking you if you want to reboot now. Press Enter again to reboot the Raspberry Pi.

When your Raspberry Pi reboots it should go straight to the LXDE GUI desktop. Using this configuration should make the system more "user friendly" because there is no need to log in or type "startx" each time, but the command line prompt is still easily accessible via LXTerminal if you need it. It also makes shutting down your Raspberry Pi simpler because now, when you click on "Logout" you get the following options:


If you click on "Shutdown" the LXDE GUI will close and your Raspberry Pi will safely shut down so that the power can be safely disconnected.

If you click on "Reboot" the LXDE GUI will close and the Raspberry Pi will restart and reload the GUI.

If you click on "Logout" you will have the option to log in as a different user.

You can of course revert to booting to the Linux command line by running the Raspberry Pi configuration utility again (in LXTerminal), selecting the "boot_behaviour" option, and then choosing the "No" option on the "Should we boot straight to desktop?" dialogue.