Friday 5 July 2013

XBMC Raspberry Pi remote control using a smart phone

This is a really cool trick, and isn't as difficult as you might think. It also allows you to ditch the keyboard and mouse which makes it possible to have a really discreet installation on your TV with no trailing wires or external hardware (apart from the Raspberry Pi itself of course). Go to "System" and them select "Settings"


Then select "Services"...


...and then choose "Webserver" and check that the "Allow control of XBMC via HTTP" option is selected (i'e' it has a red dot beside it).


Then go back to the home menu and select "System" and then "System Info"


This will display the "Summary information" screen. Make a note of the IP address (in my case 192.168.1.107)


That's all that is required in the way of setup on your Raspberry Pi!

Now go to the App Store on your smart phone and search for and install the XBMC app. There is an app available for both iPhone and Android. The following screenshots were taken from my iPhone, but the setup process should be similar for Android users. When you launch the app on your smart phone you'll see the following screen.Select "Add Host"...


...and then enter the details for your Raspberry Pi. All you need to enter is Description, IP address, Username (pi) and Password (raspberry) and then select "Save".


On the following screen select the "XBMC Raspberry Pi" entry....


...and then choose "Remote Control.


 You should now have a virtual remote control on your smart phone which you can use to control your Raspberry Pi media centre.


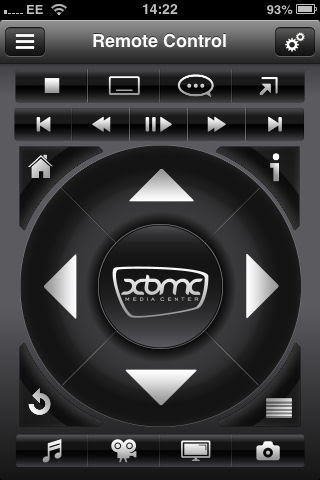
That's it! You can now power down your Raspberry Pi and unplug the USB hub along with the keyboard and mouse and when you power your Raspberry Pi up again you can control it from your smart phone.

Monday 1 July 2013

Configuring XBMC on the Raspberry Pi

Once XBMC has installed itself on your Raspberry Pi you should see the following screen:


The first thing you need to do is tell XBMC where you are in the world and set the time zone. To do this go to "System", and then choose "Settings":


Then Click on "Appearance"...


...and then select "International" and enter your Language, Region, Timezone country and Timezone.


When you've done that click on the little house icon on the bottom right corner of the screen to go back to the main menu.

For me, the next task was to connect my Raspberry Pi to my WiFi network, (but of course you may be happy to stick with the wired ethernet connection). To connect to your WiFi network, the first thing you need to do is power down power down your Raspberry Pi by clicking on the "switch" icon on the bottom left of the screen...


and then select "Power off System" so safely power down your Raspberry Pi.


Your Raspberry Pi has two USB ports, which currently have a keyboard and mouse attached to them. You will (at least temporarily) need a to provide more USB ports by using a USB Hub. Cut Price Cables sells a simple unpowered hub which is ideal for this purpose - see this blog post for details.Connect the hub one of the USB ports on your Raspberry Pi and then connect your keyboard and mouse to the hub. Then, connect a USB WiFi adapter to the spare USB port on your Raspberry Pi. Again, Cut Price Cables sells a suitable USB WiFi adapter on their web site.

Now power up your Raspberry Pi and when it's up and running go to "Programs" and select "Raspbmc Settings":


Then choose "Network Configuration" and change "Network Mode" to "Wireless (WIFI) Network".


Then scroll down and enter the details for your wireless network. You'll need to know your WiFi SSID, and details of the type of security you use and the key to permit access to your WiFi network.


Click on "OK" and then power down your Raspberry Pi. Remove the wired Ethernet cable and power your Raspberry Pi back up again. You should now have WiFi access, which means that you can use your Raspberry Pi on any display screen or TV where you have a WiFi signal simply by connecting it using an HDMI cable, and also connecting to a power source.

In my next post I'll show you how you can get rid of the keyboard and mouse and control your Raspberry Pi  media center remotely using your smart phone.